azure
Azure Databricks Integration with QlikView
Components
- Azure Databricks
-
QlikView Desktop
Note: This tutorial/ guide is for Windows Machines
Instructions
- First let’s collect Azure Databricks related configuration as follows:
- Select Cluster
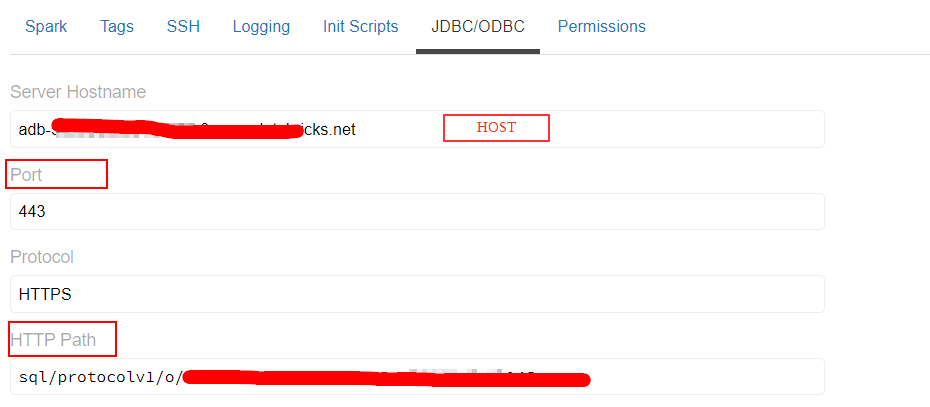
Azure Databricks → Clusters (select the cluster for compute and return results to QlikView) - Get Configuration
Configuration tab → Advanced Settings → JDBC/ODBC - Gather following highlighted details
- Generate AAD token
- Copy this data to some file for further use
- Select Cluster
- Download Simba ODBC Driver from the link Databricks-Simba-odbc-driver or alternatively get it from this git prerequisites/SimbaODBCDriver.zip
- After extracting the downloaded file, we will have msi installer file as follows:

- Install the driver, by choosing appropriate options
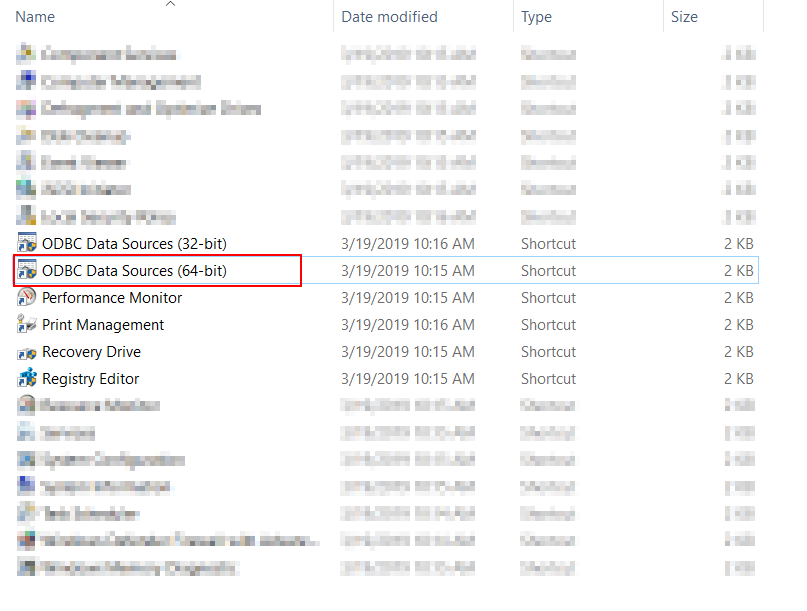
- Navigate to setup Azure Databricks data source in the system as follows:
Control Panel → View by (Large Icons) at top right corner → Administrative Tools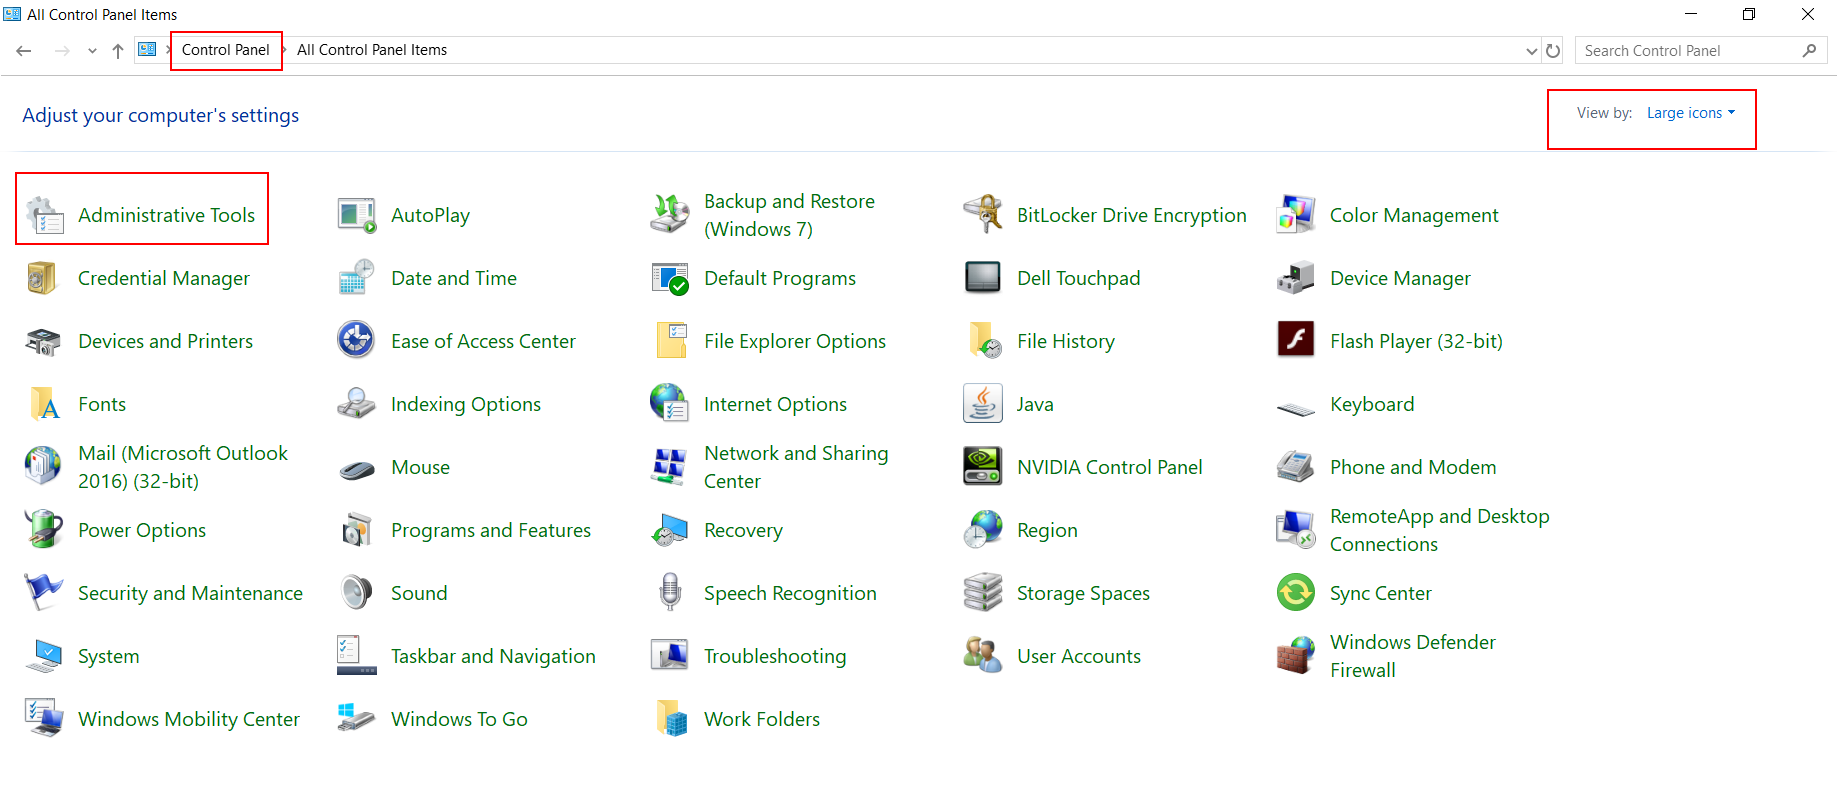
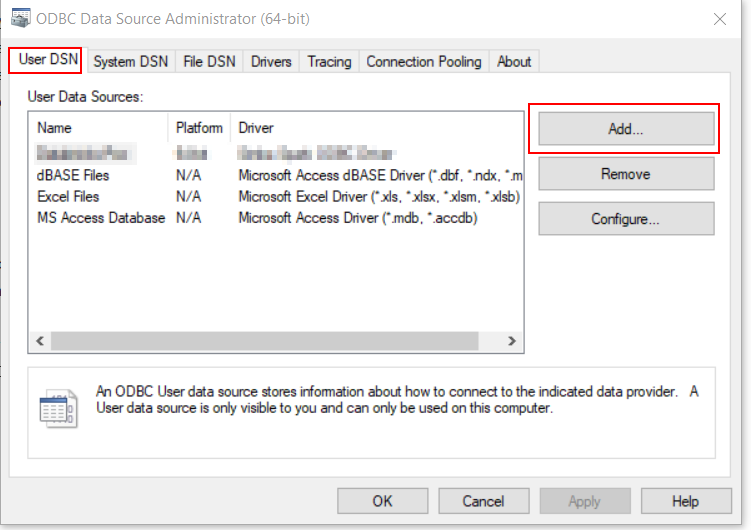
- Click Add in User DSN/ System DSN, based on your needs.
-
Make sure to select/ update with following configuration
Parameter/ Setting Value Data Source Name as required Description optional Spark Server Type SparkThriftServer Service Discovery Mode No Service Discovery Host HOST_FROM_DATABRICKS_CLUSTERPort PORT_FROM_DATABRICKS_CLUSTER(default value: 443)Database default is sufficient for this integration Authentication OAuth 2.0 Delegation UID BLANKOAuth Options > Authentication Flow Token Passthrough OAuth Options > Access Token AAD Access tokenThrift Transport HTTP SSL Options Enable SSL (check this) & let it use default cacerts.pem HTTP Options HTTP_PATH_FROM_DATABRICKS_CLUSTER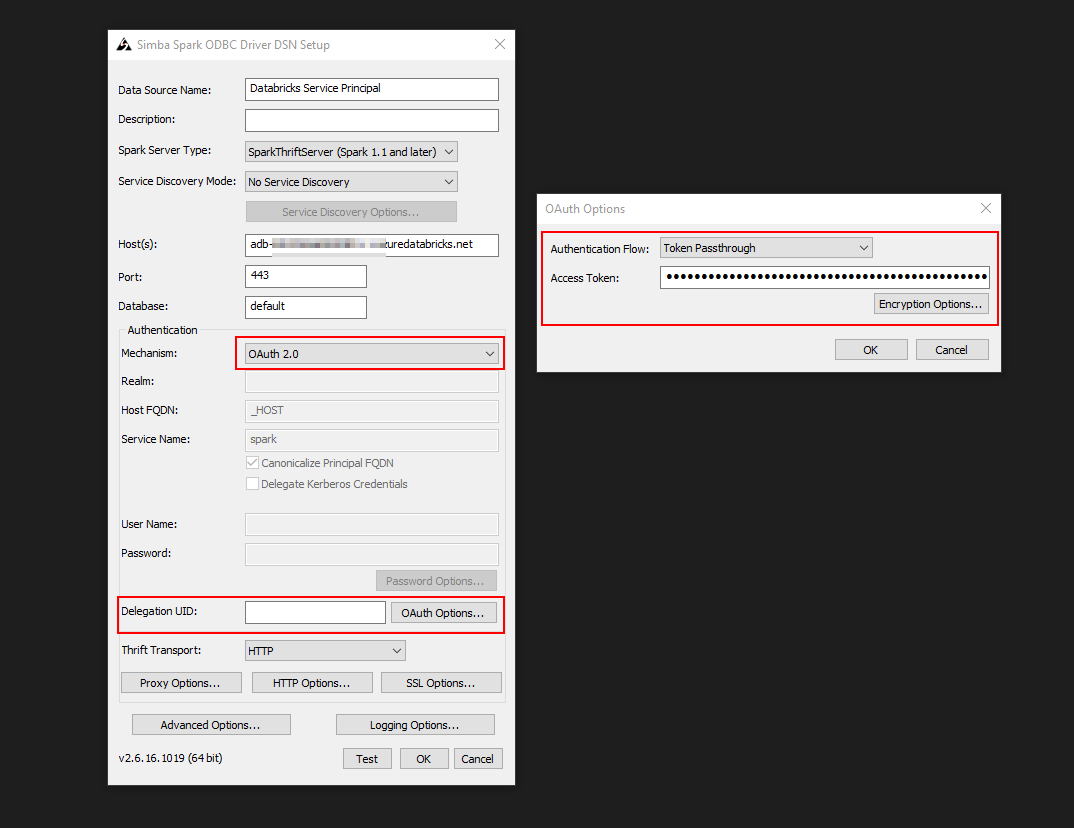
- Test Connection (this starts the cluster if it’s in terminated state and wait for the respone from cluster to the DSN ODBC driver Setup)
- Result from DSN Setup
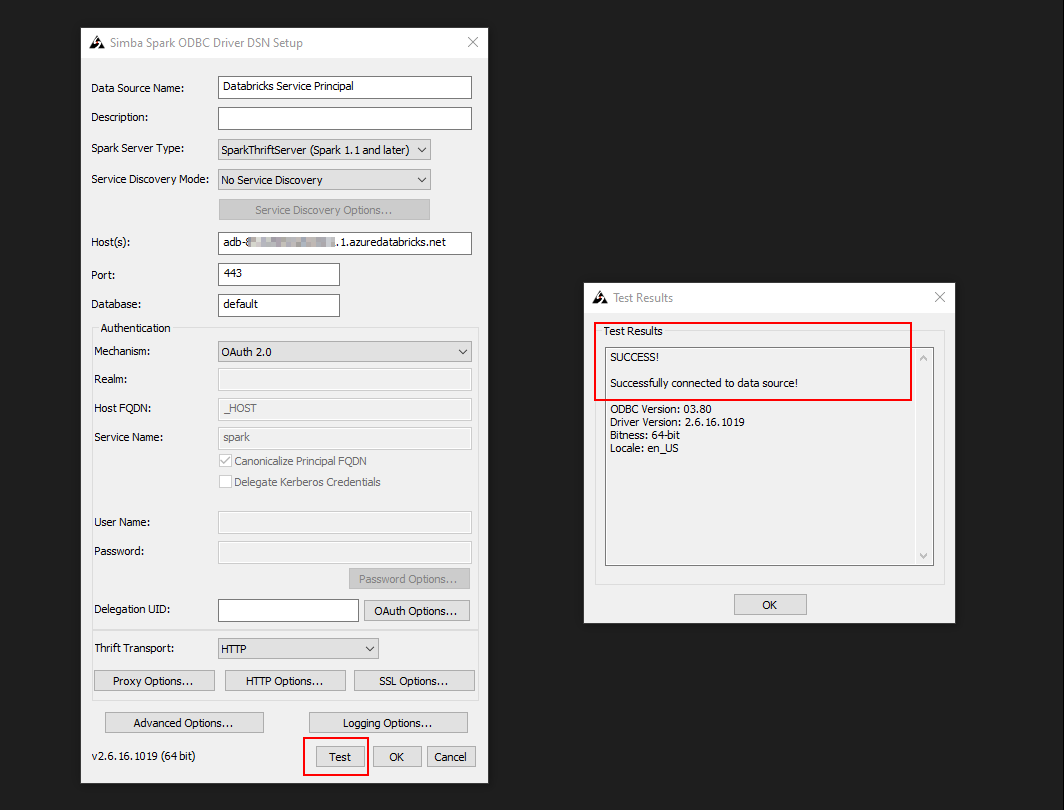
- Result from DSN Setup
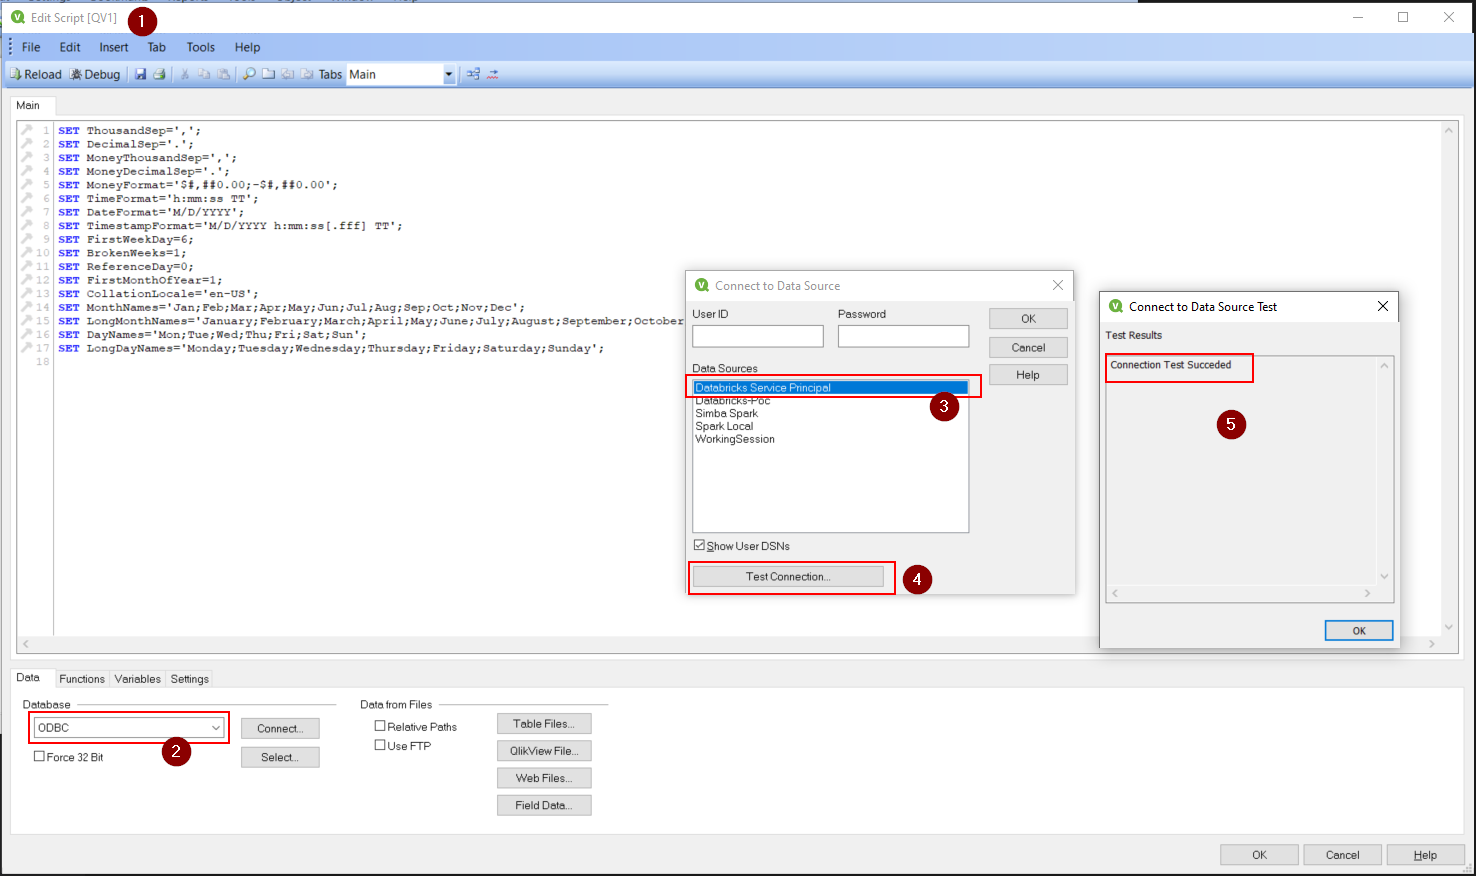
- Open QlikView and Edit Script (Ctrl+E)
- Select ODBC Database & Click connect and check Show USER DSNs (if you have setup USER DSN rather than System DSN) → Select Data Source name we have created → Click OK (if required, you can test connection)
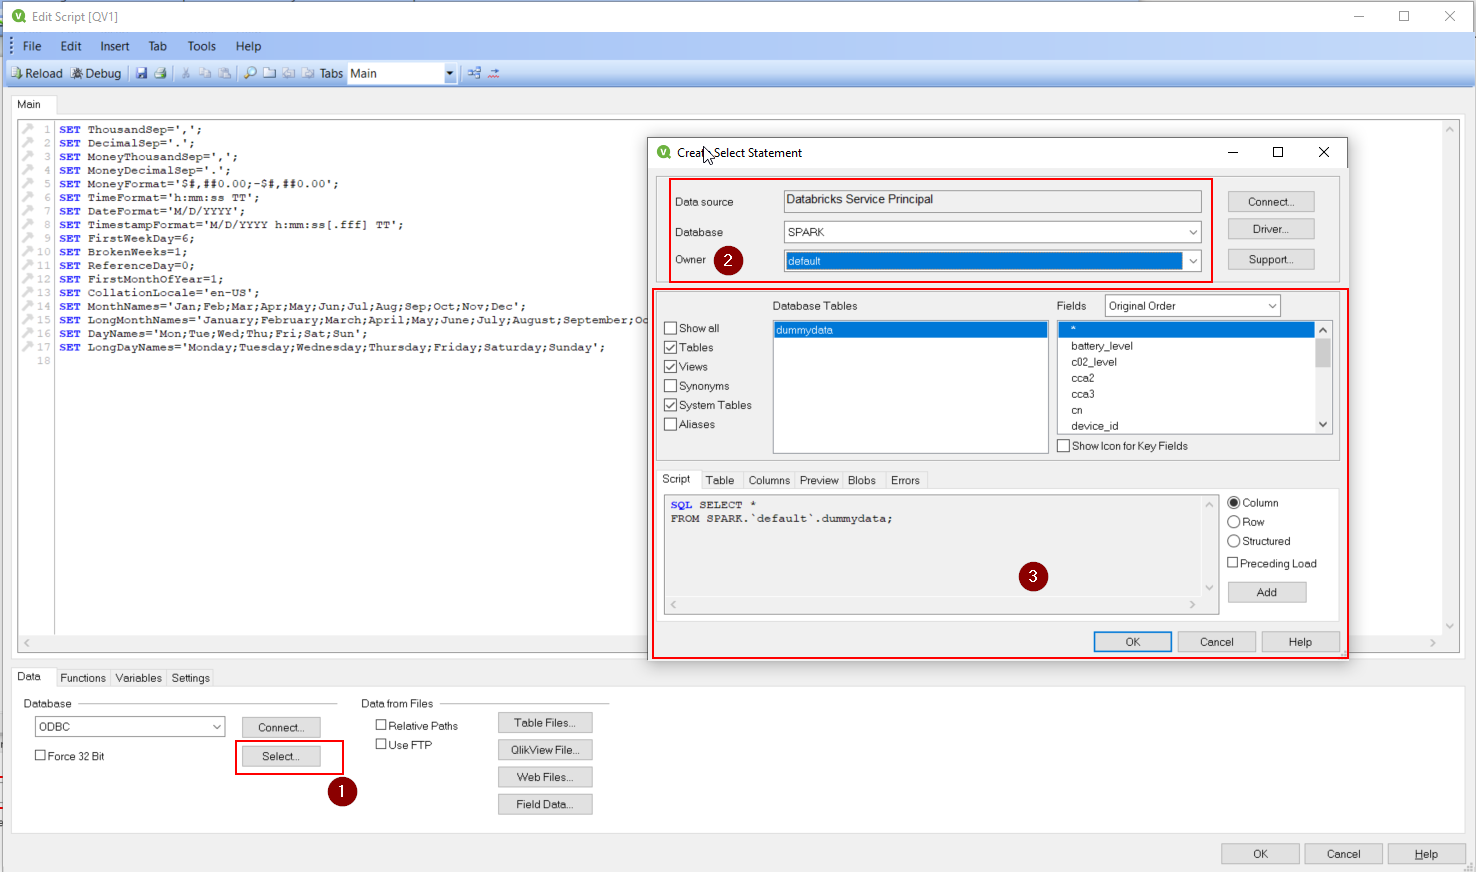
- Click Select to select the database and tables to be loaded into QlikView reports as follows:
- Click Reload once we have the SQL statement append to the file, this queries and loads data from databricks database to the qvw table object
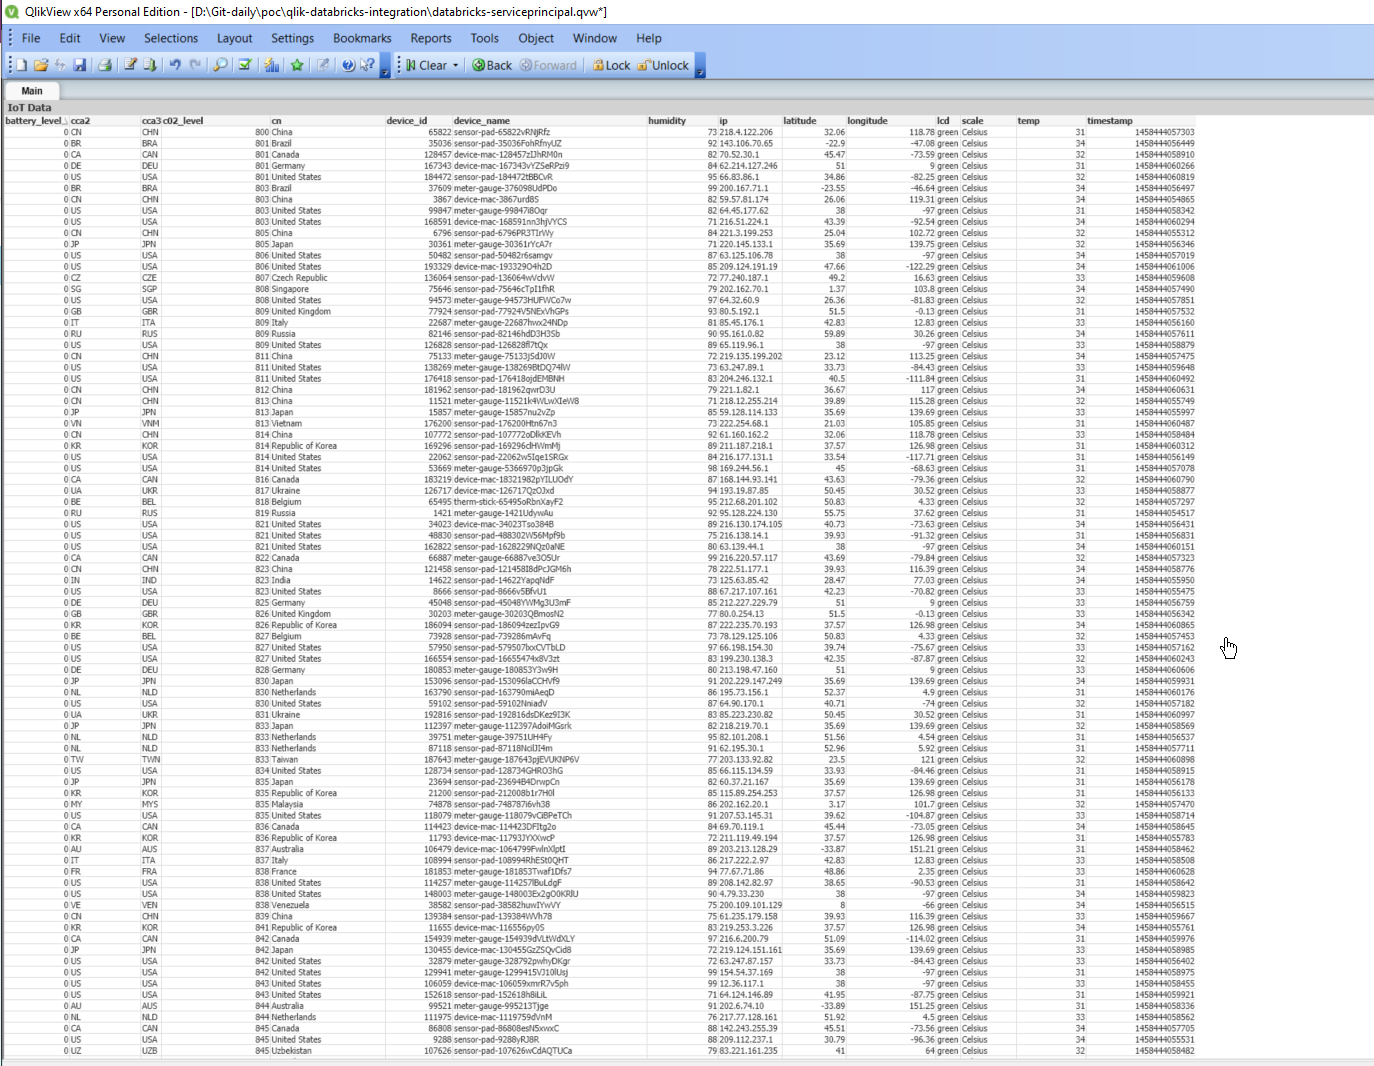
- Following is the data, when displayed using
Object → New Sheet Object → Table Box